Before I retired, I spent a good deal of time taking part in online webinars to keep current with new media trends. One resource I discovered is leadership and culture coach Christine Comaford, who for 30 years has been helping leaders navigate growth and change using her expertise in human behavior and applied neuroscience.
Applied neuroscience. What a wonderful term. Not just neuroscience, but applied neuroscience.
In her presentations, Comaford simplifies the functions of the human brain by focusing on three different areas she refers to as the reptilian brain, the mammalian brain, and the pre-fontal and neo-cortex which she refers to as the executive brain.
Simplifying even further, she assigns a question to each of the three areas. The reptilian brain deals with the question “am I safe?” The mammalian brain addresses “do I belong?” and the executive brain concerns itself with “do I matter?”
These three questions are useful considering when viewing marketing messages and even the news. Marketing messages or news stories that focus on fear of your surroundings address the reptilian brain. Those that focus on differences between you and others address the mammalian brain. Understanding this can help raise your thinking above these lower functions by shifting attention to the executive function question of mattering.
The United Nations designated June 20 each year as World Refugee Day in order to highlight the needs, rights, and desires of refugees who have fled their homes in order to escape persecution and conflict. The goal is to keep the focus on the plight of refugees until ways to improve their lives are found so that they not only survive but thrive.
The first observation of World Refugee Day was in 2001, to mark the 50th anniversary of the 1951 Convention on the Status of Refugees.
Refugees face a number of challenges even after they have managed to escape the countries they left because of persecution, conflict, natural disaster, or other circumstances that interfere with public order. Outside of the environments they knew, finding a doctor or schools for their children or safe areas for their children to play are new challenges. Resettlement to a permanent location may take years, putting refugees in a state of limbo with regard to their education, health, and safety.
This year’s UN Refugee Agency’s theme for World Refugee Day is Together We Heal, Learn, and Shine which emphasizes the power of inclusion. Whether refugees are in temporary camps or have been resettled into permanent residences, making sure they receive high quality health care, education for both children and adults, and opportunities to participate in sports and other creative activities is essential to creating a path for them to contribute to society.
World Refugee Day offers us all an opportunity to build our empathy for others through sharing the stories of refugees, especially the stories of their successes, such as those linked below.
MS Word offers two styles of quotation marks: smart quotes and straight quotes.
Smart quotes, sometimes called curly quotes, curve or lean depending on whether they are at the beginning or the end of quoted text. Smart quotes are typical of printed matter, such as the text in books, magazines, and newspapers.
Straight quotes replicate what fixed-font typewriters could produce and are the same no matter where they appear. The examples below illustrate the two options.
Most of the time it doesn’t matter which style you use, but you should be consistent throughout each piece. The default setting for new documents is usually the smart quotes style. You can choose between the two styles through MS Word’s AutoCorrect feature and the AutoFormat As You Type option.
Since the specific steps to select the option depend on your computer’s operating system and the release level of MS Word, search for MS Word smart vs straight quotes in your search engine to find instructions that apply in your situation.
Because you can choose between the two styles, it is possible that you will end up with both styles of quotes within the same document. For example, if you start the document with smart quotes turned on, and you then change the style to straight quotes as you type, the smart quotes previously typed do not change. You’ll end up with both styles. Another frequent means of both styles being in the same document results from copying text from one document created with straight quotes, for example, and pasting it into another one with smart quotes.
If you discover you have both smart and straight quotes in the same piece, you need to fix it.
Make sure your AutoFormat As You Type feature is set for the style you prefer.
Use Word’s Find and Replace feature to replace every instance of the quote mark character (“) with the quote mark character (“).
This may seem silly since you will type the same character in both the Find and the Replace boxes. But MS Word will find the quote character (“) without regard to whether it is smart or straight, and it will replace the quote character (“) in the styling you selected for AutoFormat As You Type, thus ensuring every quote character appears the same.
The video below illustrates using Find and Replace on a PC with Word 2019, Word 2016, and Office 365. The concept is the same for Word on a Mac or other release levels, though the specific steps may differ. Note: The advice in this video to avoid using Replace All is good general advice, but in this case, you should use it.
Video from Goodwill Foundation Community, a free educational video channel on YouTube
But don’t stop here. Because you may have both double quotes and single quotes within your manuscript, you should repeat the above steps for single quotes as well.
Single quotes vs apostrophes
The single quote character may also be used as an apostrophe in contractions or to represent missing letters. See the examples below.
The first of the two examples illustrates a smart single quote as an apostrophe at the beginning, in the middle, and at the end of a word. But remember that smart quotes curl depending on whether they precede or follow text. This results in a problem when the apostrophe is at the beginning of a word, as in the case of ’cause above. With the smart quotes option activated, a single quote before the letters cause will curl the wrong way unless you trick Word into thinking there is text before the quote as well as after it. The example below is just as the text was typed, without any tricks to fix the second apostrophe.
An example with an apostrophe to show missin’ letters ‘cause you need to show you know they’re missing, with smart quotes.
The easiest way to do this is to type two single quotes and then delete the first one that curls the wrong way. See below.
An example with an apostrophe to show missin’ letters ‘’cause you need to show you know they’re missing, with smart quotes.
Now that both left and right curling single quote characters are in the text, delete the first one, leaving the second one in place as the apostrophe.
All the formatting information for the document is stored with the final character on that document. That final character is not visible, but you can see it with MS Word’s Show-Hide feature (3-MS Word Tips: The Show-Hide Feature) turned on. It appears as the final paragraph symbol on the document. Only the final paragraph symbol contains the document formatting information.
When you create a new document, the final paragraph symbol contains all the formatting information from the template. Got that? I’ve said it four times for emphasis, not because I didn’t edit this piece carefully.
When you change the settings for the document (the paper size and orientation and margins) the new information replaces the template settings on the new document, but the template remains the same. This is why when you create a new document, its formatting will not be the same as the final result of the last document you saved. I know I’m repeating myself again, but it’s important that it’s clear that changing a document’s formatting does nothing to the template used to create the document.
The video below illustrate how to change two aspects of a document from the template’s preformatted settings—the line spacing within and between paragraphs.
While the document formatting information is stored with the final paragraph symbol, each other paragraph symbol also stores formatting information, but that information is limited to the paragraph formatting, such as whether the first line is indented, the paragraph is bulleted or part of an outline, or the paragraph is double spaced. Knowing how to change the spacing within and between paragraphs is only part of what you should know.
Most important to understand is that when you press the return key to create a new paragraph, all the paragraph formatting information from the previous paragraph is copied to the new paragraph. This is why it is possible to begin a bulleted list and continue with the next bullet by pressing return at the end of the line. This is also why it may seem troublesome to get the bullets to stop appearing when you have no more items for the list.
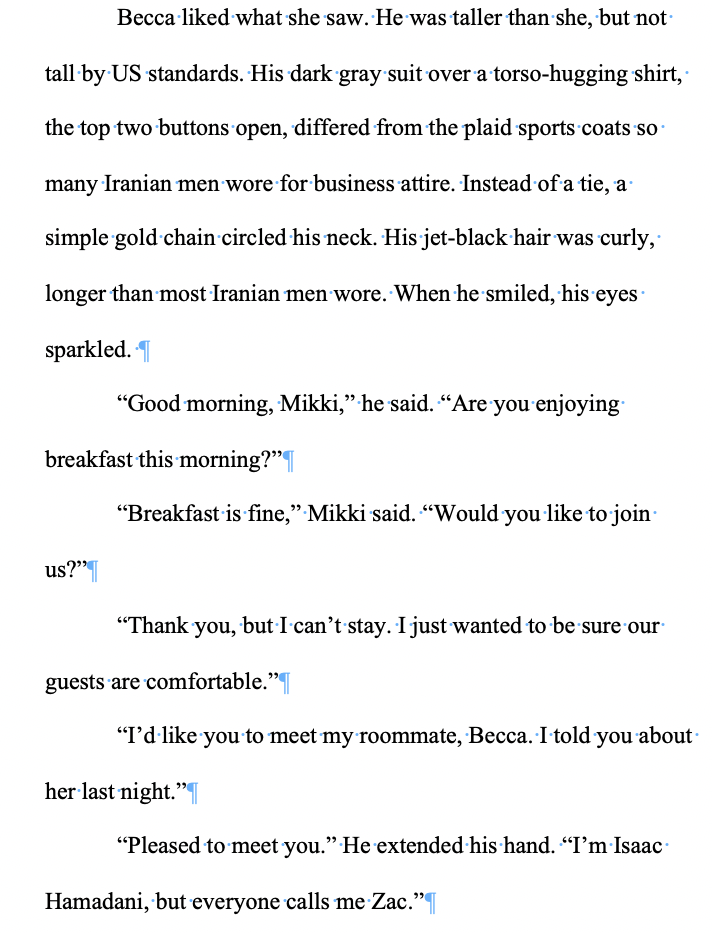
To see why it’s important to understand where the paragraph formatting is stored, let’s look again at the sample paragraphs from an earlier post (3-MS Word Tip: The Show-Hide Feature).
Because the Show-Hide feature is on, it’s possible to see that the indentations and spaces within and between paragraphs are all the same. If the cursor is anchored at any place within this document, any new paragraph created by pressing the return key will have the same format—double spaced, first line indented 1/2 inch, and no extra space between the paragraphs.
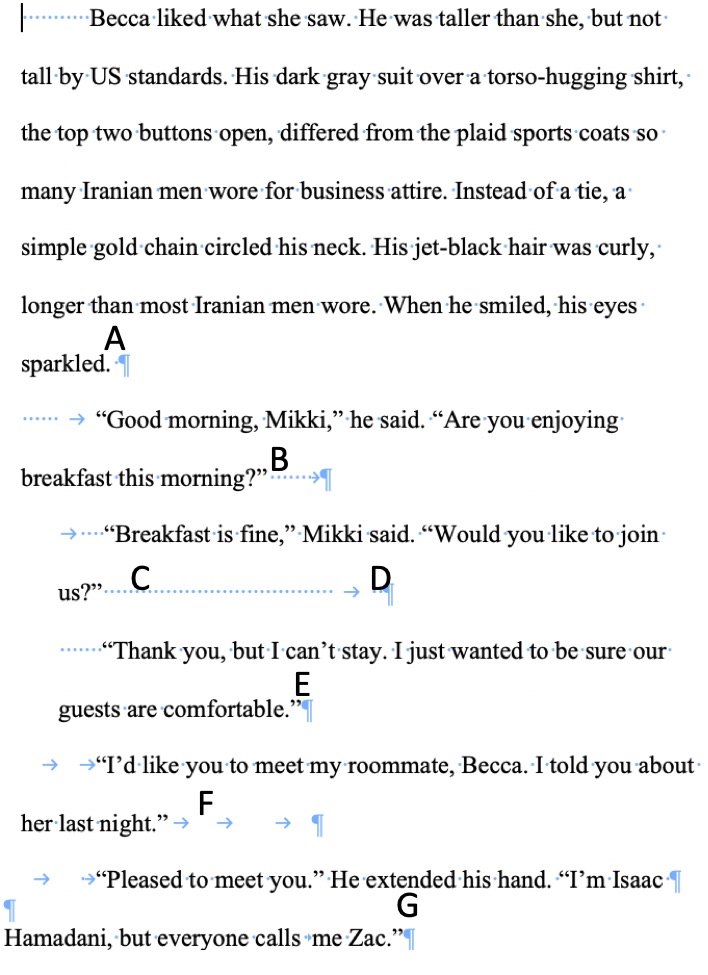
In contrast, positioning the cursor at different spots in the following example will have very different results.
See the chart below to see how the following paragraph will be formatted when a return is typed at each of the insertion points indicated above.
Insertion Point
New Paragraph Formatting
A
Double spaced, no indent at left unless manually entered
B
Double spaced, no indent at left unless manually entered. In addition, the spaces and tab to the right of Point B will be carried over to the end of the next paragraph.
C
Double spaced, indent of 1/4 inch at left. The spaces and tab following Point C will be carried over to the end of the next paragraph.
D
Same as C—Double spaced, indent of 1/4 inch at left, but without the extra spaces and tab being carried over to the end of the next paragraph.
E
Double spaced, no indent at left unless manually entered
F
Double spaced, no indent at left unless manually entered, with the two tabs being carried over to the end of the next paragraph.
G
Single spaced, no indent at left unless manually entered.
When printed, all six paragraphs in this example appear double-spaced and with a 1/2 inch indentation at the left margin. Yet, no two new paragraphs created at the seven insertion points will be formatted the same as the others. That fact makes it difficult for line editors or copy editors to make recommended changes because what appears next may also need to be edited for formatting rather than for language.
The best way to ensure all paragraphs within a document are formatted the same, so that any new paragraph created by pressing the return key will also be the same, is to highlight all the text and then reset the paragraph formatting as you want. The result may initially appear to be a mess, but it’s better to fix things before going further. Then, with the Show-Hide feature turned on, use the Find and Replace feature to find all instances of unneeded tab characters or sequences of spaces and delete them.
MS Word provides two separate options for formatting documents.
The first is Page Setup or Layout which includes setting the parameters for how each physical page will print. The image at the top of this post shows a collage of menu screens for Page Layout with MS Word for a Mac.
The second is Document formatting which includes setting parameters for how the text will appear on the electronic page.
Providing two means to format a page may seem redundant, but consider that the paper goes through your printer only one way while the orientation of the text on the paper may vary not only from page to page, but even within a single printed page. Having the ability to separate the formatting for the physical page from formatting the electronic page gives writers both flexibility and control.
In addition, the printout of a document prepared on one computer and then forwarded to someone else may appear with a slightly different layout from its appearance on the original screen. Documents prepared to be printed on letter paper, for example, when printed on slightly narrower and longer A4 paper in Europe may break lines at different locations or have page breaks at different points.
Since MS Word is available for both PCs and Macs, the specifics for how you use the two formatting options differ by operating system and release level of Microsoft Word. To learn about your computer and MS Word release level, search for MS Word Page Setup using your favorite search engine.
Page Setup or Page Layout
The primary function of Page Setup in MS Word is to identify the printer, and sometimes the paper, to be used when selecting Print. However, most versions of Word offer some Page Layout options, such as page orientation or paper size, on the same screen, which may be confusing to someone who isn’t aware that Page Layout features are also part of MS Word’s Document formatting features.
When it is necessary to control the appearance of text regardless of how it may be viewed on a computer screen or printed, use of PDF (portable document format) is preferable. But PDF documents cannot easily be edited and are therefore not appropriate for submitting manuscripts for contests or for publication.
The following videos demonstrate how to set up the document for printing the physical document. The version of MS Word, e.g., 2010, 2013, 2016, is not referred to, but the concept remains the same across releases.
The video below is from Goodwill Community Foundation which provides video training at no cost.
Versions for Mac OS differ somewhat, but again, the concepts are the same. The video below illustrates the same options for Word on a Mac.
There is little information available about the creator of this video, unlike Goodwill Community Foundation, except that the presenter began creating videos in 2015 and has a number of short videos on YouTube that have been viewed nearly 400,000 times.
If the version of Word you have does not look like either of these videos, search YouTube using terms such as “Page Setup MS Word 20xx for PC” replacing xx with the year of the version of Word you are using.
Document Formatting
You don’t need to know anything about Document formatting to create or edit Word documents. That’s both an advantage and a disadvantage.
You don’t need to know anything about formatting a document because every document you create in Word has been preformatted by the template assigned to it when it was created. Every Word document is assigned to a template. Most of the time, that template is called normal.dotm. That template identifies all of the following in each document:
the name, size, color, and characteristics (e.g. bold, italic, underlined, or any combination of those) of the font,
the spacing between lines and paragraphs,
the tab locations,
whether paragraphs are indented,
whether the document has a header or a footer,
the top, bottom, right, and left margins,
the orientation of the page—portrait or landscape,
whether the text appears in columns,
whether widow or orphan lines are permitted in the document, and
anything else you can do to the format of a given Word document.
Normal.dotm serves as the default document formatting when you begin a new document. But it does not prevent you from changing the formatting.
For example, if normal.dotm defines the font of the document to be Bookman Antigua, 10 point, neither italics nor bold, you can change the font of everything on the document to Times New Roman, 12 point either before you begin typing or at any time afterwards. Changing the font definition in a specific document does not change normal.dotm unless you specify these changes should be made to the template.
If normal.dotm defines the margins as 1 inch at top, bottom, right, and left of the document, you can change the margins for the document
All the formatting information for the the document is stored with the final character on each document. That final character is not visible, but you can see it with MS Word’s Show-Hide Feature turned on. It appears as the final paragraph symbol on the document. Only the final paragraph symbol contains the document formatting information. If the screen shot below were a complete document, the paragraph symbol that appears at the bottom of the screen is where all the formatting information for the entire document is stored.
Get used to using both these means for setting up your manuscripts.
MS Word templates are like cookie cutters. Everytime you begin a new document in MS Word, formatting options such as the indentation of each paragraph, the spacing between paragraphs, the spacing between lines within a paragraph, the font style and size, and much more are determined by the Word template you chose when you created the new document. Each new document is a copy of the template that cut it.
Even if you think you didn’t make a choice, you did. If you start typing without choosing anything, MS Word makes the choice for you by providing a default template, normal.dotm. The template is like a map or pattern for every new document. Each new document is a copy of the template’s formatting, all of which can be changed in your new document. But the template remains the same, available to be used again later.
The default settings for the normal.dotm template on my Mac laptop are as follows:
US letter-sized paper
Calibri font, 12-point size
single spacing within paragraphs
no extra points of space after each paragraph
no indentation of the first line
no tab stops set, but default stops every .5 inches
1-inch margins at top, bottom, left, and right
portrait orientation
Unless I change the formatting of a new document, these formatting instructions will apply. And even if I change the formatting of the document I am editing, the next one I create will go right back to the default formating of normal.dotm.
The settings for normal.dotm on a Windows PC may differ. You can discover the settings for normal.dotm by reviewing the page layout, paragraph layout, font choice, and other formatting information after you create a new document before you begin typing on it.
Can the default settings be changed?
You can change any of these default settings, but those changes will only apply to the specific document you are creating or editing—the specific copy of the template. If you make the changes before you begin typing, the changes will apply to everything you type on that document. But, if you make changes after you have already begun creating the document, the changes will only apply from the point where your cursor is anchored. If you move the cursor to another place in the document, the changes you made will not apply. I hope the chart below will help make clear the impact of changes you make to the format of the current and other documents.
Action
Effect on Template
Effect on Current Document
Effect on Previous Documents
Effect on Future Documents
Create a new document
none
matches format of the selected template
none
none
Change margins before adding text
none
margins will change for the entire document
none
none
Change margins after typing has begun
none
margins will change for either the document, page, or section, depending on the author’s choice
none
none
Adding tab stops before adding text
none
tab stops will apply across the document
none
none
Adding tab stops after typing has begun
none
tab stops will apply from the point at which the cursor is anchored and for any text typed afterwards*
none
none
Changing the font before adding text
none
font type and size will match the change throughout the document
none
none
Changing the font after typing has begun
none
font type and size will match the change from the point at which the cursor is anchored and for any text typed afterwards*
none
none
Changing the paragraph style before adding text
none
paragraph format will match the changed paragraph style throughout the document
none
none
Changing the paragraph style after typing has begun
none
paragraph format will match the change from the point at which the cursor is anchored and for any text typed afterwards*
none
none
Changing the settings on normal.dotm
everything will change to match the new settings
see information below about how to change normal.dotm
none
all future documents will match the new formatting of the changed template
*If you make changes to any of the settings and wish them to apply to the entire document, you must highlight the entire document before changing the settings so that the changes apply to everything that is highlighted.
May I have more than one template on my computer?
Yes, you may have multiple templates, but if you do not choose one, the normal template will be applied. If you choose New Document from the File options in the main menu, you are choosing normal.dotm as the template. To choose a different template, you must choose New from Template from the File option menu and then choose one of the templates that appear. MS Word comes with many templates preloaded.
You can also create a new template, or change normal.dotm so that new documents are created with a different style or size of font or line spacing or tab settings, if you want to use different settings for every new document you create. Using the cookie cutter analogy again, if you want round cookies, you’d rather use a round cutter from the beginning than have to cut off the edges of a square cookie and then reshape the edges of every new cookie.
First, understand what normal.dotm does. If you decide you want different formatting features to be standard for every document you create, you may want to change normal.dotm. If, in contrast, you decide it would be helpful to have a specific set of formatting features available when you start a specific set of documents, such as new manuscripts for your read-and-critique group or for submitting to contests, you may want to create a new template with a unique name for that set of documents.
Because the means to change normal.dotm vary from release to release as well as from PCs to Macs, I recommend searching for instructions until you find what works for your computer.
Creating a new template is easier. When you have formatted a new document with all the features you want for it, use Save As Template or Save As and select Word Template (.dotx) in the File Format drop down list. Give your template a name that you will recognize whenever you need to create a new document with those formatting features.
The video below shows how to create a new template as well as how to update an existing template, including normal.dotm, for Microsoft Word 2016 for Windows. If these instructions do not work for your computer, search for “creating templates for MS Word 20xx” with the release year of your MS Word replacing xx.
You’re ready to submit a piece to a contest or for consideration in the Guild’s anthology, and the submission guidelines say the piece must have 1-inch margins on top, bottom, left, and right; be double spaced, with the first line of each paragraph indented 1/2 inch; and the font must be Times New Roman, 12 pt size.
Easy enough to do, right? Well, let’s look at some examples.
From a draft work-in-progress, used with the author’s permission
This view ignores the document margins to illustrate the texts as two examples side by side. The texts in the two views appear the same, right? Both double spaced, both indented 1/2 inch on the first line of each paragraph, both in Times New Roman 12 pt. Both versions meet the criteria for submission outlined at the beginning of this post. If you printed this out, both versions would appear the same on the printed page.
But to a copy editor or book designer, the contents of these two views are very different. Knowing how to use the Show-Hide Feature in MS Word will reveal how these two views differ. Here’s the same side-by-side view of the two selections with Microsoft Word’s Show-Hide feature turned on.
Each of the paragraphs in the left view is formatted using different MS Word features or has additional hidden characters that will affect how the text must be handled when it is incorporated into a larger document. Some paragraphs are indented with spaces, some with tabs, some with multiple tabs, some with a combination of spaces and tabs. Editing the text illustrated on the left side may result in unexpected line breaks or white space on the page. If this has happened to you, keep reading.
On the right hand view, the paragraphs are all formatted the same, using Microsoft Word’s paragraph formatting option. No tabs or extra spaces indent the paragraphs. And no paragraph has extra spaces or tabs after the sentence-ending punctuation.
Your submission to a contest or anthology may be accepted on the basis of how the printed version appears, but you can make some friends with the editors and designers by learning to use Microsoft Word’s formatting features to clean up your text of unneeded hidden characters.
If you are not familar with Microsoft Word’s Show-Hide feature, check out the following resources:
I recently met an author of a police thriller series, Kevin G. Chapman, through AXP’s Typo-Killer program. I signed up as a reader for that program in part to get more experience with proofreading and in part because I’m just an English language nerd. Kevin’s next novel, Fatal Infraction, the fourth in his series of four novels, was my first experience with the program, and as soon as the book officially launches, I’ll be adding a review. The process led to several subsequent conversations with him.
When I saw one of Kevin’s earlier novels, Lethal Voyage, on Bargain Booksy, I reached out to ask him about his experiences with those I mentioned in my earlier post on the topic. His response provided me with this guest post with his reflections. His response provided so much information I put it into a guest post.
Free Booksy and Fussy Librarian Free. I’ve run free book offers three times. Each time, I advertised the offers on both Free Booksy and Fussy Librarian’s free offers emails. This prevents me from knowing which one had better results, but the point was to get as many downloads as possible, so testing the effectiveness defeats that purpose. In all three cases, the book I was giving away managed to make it to #1 on the amazon “bestseller” list for free books in at least one category. That was the goal, and I got there. Each time I was in the 4,000 – 5,000 free downloads range over the course of a week. This has not translated into a ton of reviews (as hoped), nor a ton of follow-on purchases of other books in my current series (although there are only 3 current books). I did get a substantially better pre-order and launch week sales performance from book #3 in the series after I ran free offers on book #1 and book #2 in the month before launch. Some of that may also have been simply better general marketing preparation and execution for book #3. These free promotions are easy to schedule and since many subscribers get both emails daily, maximum exposure comes from being live on both.
Authors XPI love this group, both for author services and for promotions. For authors working on new books, their early reviewers program and especially their “typokillers” program (which also generates early reviews) are wonderful. Even after having a book professionally edited, there will always be typos, blemishes, small mistakes, word choice issues, and other copy editing problems that creep in after the main edit, or which you and your editor missed along the way. The typokillers (for a very modest $100) will comb through your book and point out all these errors/issues. It’s a great feeling to finally push the “publish” button knowing that your small copy editing issues have been reduced to nearly zero. Plus, those typokillers can become fans and will give you early reviews, so you get a double-bang for the bucks.
For a series, AXP offers a “Series Spotlight” option to put your whole series in front of potential readers for a reasonable cost. I recommend this in particular since you have significant creative flexibility to say what you want to say about your books. You decide what to discount and when to run the offer.
On one recent promo I got 50 downloads of my $0.99 discounted book #1, which didn’t pay for the ad, but which I consider a great result since people who pay even 99-cents for a book are more likely to actually read it and leave a review than free downloads, which tend to languish on my Kindle.
For mailing list builders, AXP is simply great. A very small fee gets you listed among other authors in a group giveaway contest. Potential readers enter the contest by providing their email address and agreeing to receive promotional emails from the participating authors. At the end of the promo, you give away a few ebook files, or maybe one paperback, and you get 700+ email addresses for potential readers in your genre. It’s also a way to get your title included among a bunch of your fellow authors’ books, which helps your branding and name recognition. Building a mailing list is hard, and getting large chunks of emails from people who are confirmed readers in your genre is well worth the small charge.
Kindle Book Review promotions Related to Bargain Booksy via Written Word Media, KBR runs the Kindle Book Award contest and offers promotions to their mailing list. The mailings are sharp and have many listings from multiple genres, and the $20 cost for a listing is low. Be careful about scheduling your promo and following up to make sure it runs as expected, but the format here is good and the “Kindle” name results in lots of open emails.
The Fussy Librarian. Best used in conjunction with a discount offer (e.g., $0.99) rather than for full-priced books, the Fussy Librarian emails don’t contain too many titles, so your book gets good exposure. I can’t vouch for sales numbers just for this promo platform (I have not pressure-tested it properly), but sales have certainly happened.
BookBub. The great thing about BookBub is that they will run free or low-cost ads for you for your new releases (if you have 1,000 followers). You can also run discount listings via CHIRP for audiobooks. For general ads, you can run cost-per-click ads that you don’t pay for unless people click on your ads — and people who click tend to buy. I run a lot of ads with low bids, which don’t generate a lot of clicks, or even impressions, but I’m not paying for them so they give me a chance to put my ads and covers in front of a lot of eyes even if they don’t buy. Cost-efficiency here is very good if you bid low. You can run a “Featured Deal,” which I hear is great, but it can run $1,500 depending on your parameters — I have not tried that yet.
As a reader, I’ve been experimenting with bargain book platforms for a couple of reasons. First, I want to see which platform appears to be most reader friendly since I may want to use one of them when I complete my work-in-progress. Second, I want to gather information about the value authors ascribe to them.
Whenever I see a book on any of these platforms written by an author I know personally, I buy the book and provide an honest and positive review. There’s always something good to be said. Then I ask the author about the experience.
Because I receive several daily emails from these platforms, I’ve seen many books offered on more than one of them on the same day and often offered again a few weeks later. That evidence suggests that authors, or their publishers, see them as good means of promoting their books. If you’ve had experience with any of them, I welcome your observations, either publicly as a comment on this post or privately by email (sandra@sandrayeaman.com).
I’ve limited this post to those I have explored, listed below in alphabetical order.
AuthorsXP has a number of programs for authors including daily emails to readers offering special pricing on books and a program to expand your audience and grow your email list. For a full range of the options AXP offers, you must create an account for yourself to see the list.
I first learned about AXP from one of San Diego Writers and Editors Guild members, Penn Wallace, who uses their program to expand his readership and grow his email list. Here’s what he has to say about that program.
I’ve worked with Authors XP (which stands for cross promotion) several times. I use them mostly for building my mailing list. I have had disappointing results when I used them to try and sell books.
Amy [of AXP] runs a weekly promotion. It is usually for one genre (thrillers, romance, female heroes, etc.). She signs up twenty to forty authors to participate. The promotion promises each reader the chance to win ALL of the authors’ promoted books. In some cases that’s forty books. All the reader has to do is sign up for the mailing list of all the authors.
There are two grand prize winners who get all the books. Each other winner gets one book. The author must donate 3 books. They must also promote the promotion on their website or newsletter.
They have been extremely helpful to me in getting people on my mailing list. All of the people have opted in, so I have no problem with adding them to my list. I send out a letter welcoming them to the club about two to three days after the promotion. I don’t think I’ve ever gotten fewer that a thousand new names and in some cases have gotten around five thousand names.
This is a great, inexpensive way to grow your list. (It cost about fifty bucks.)
Another of AXP’s programs offers authors with a book series the opportunity to introduce readers to the complete set at a low price for each. Penn used that program recently to offer his full Catrina Flaherty series as part of his launch of the latest in that series, The Panama Murders. Since I’d already read the first three, I was happy to pick up the latest since I already knew what to look for from his protagonist, Catrina.
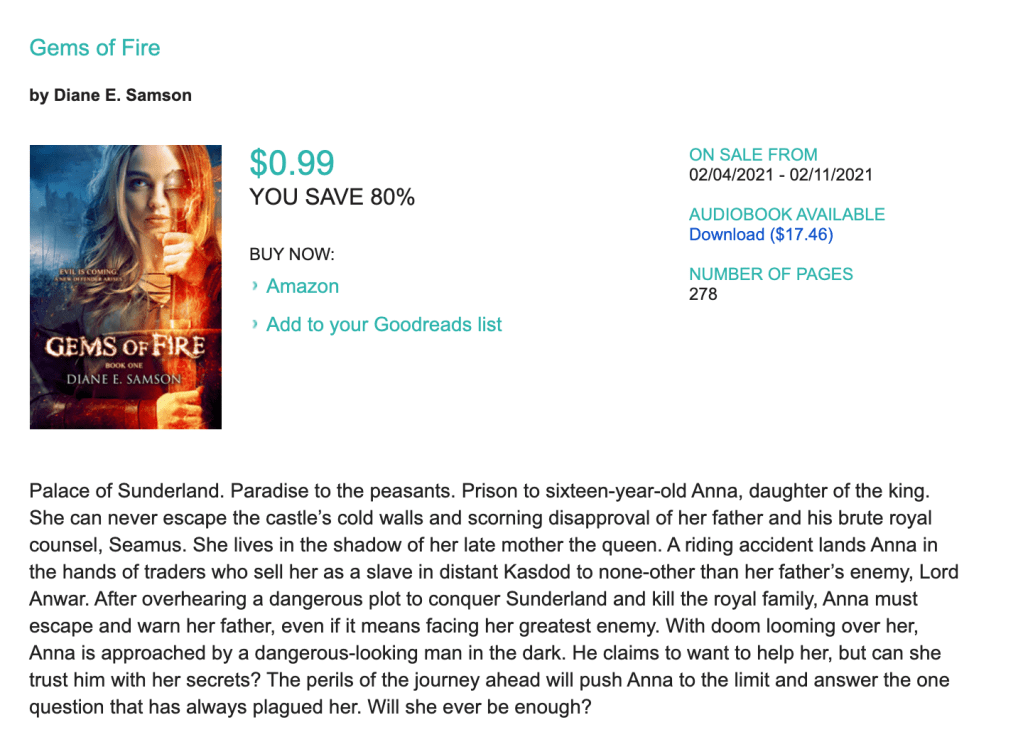
I like the large, centrally positioned image of the book cover. There is enough information for me to decide if I’m interested. And the prices are always good.
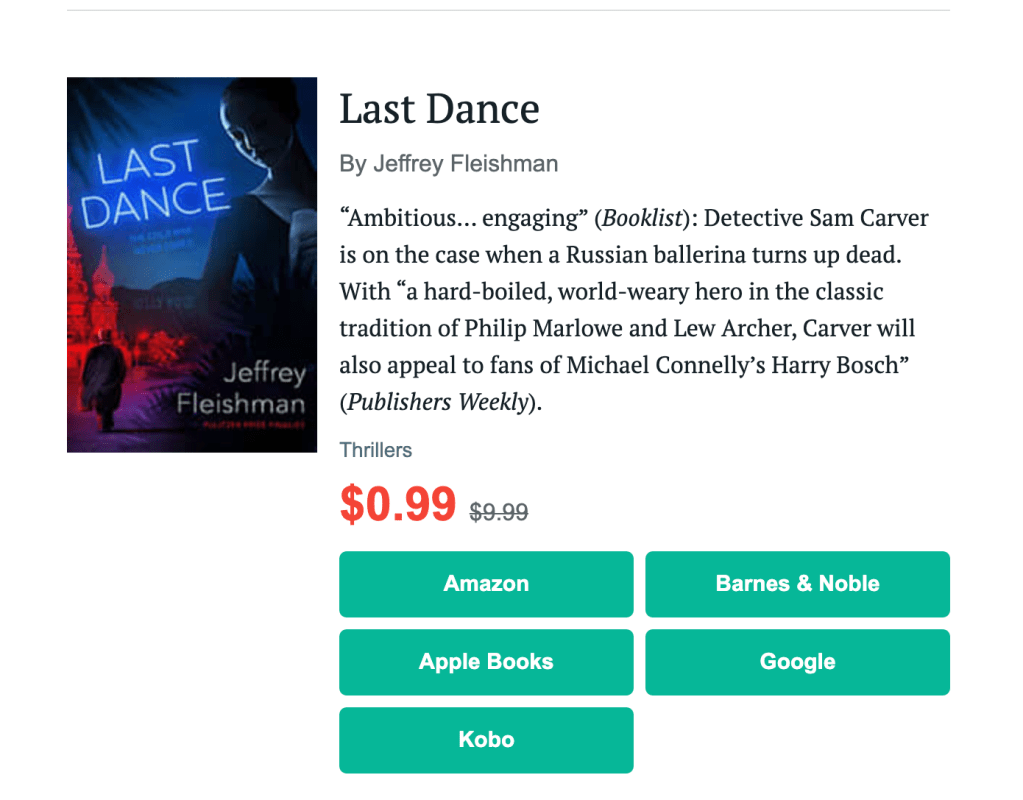
Corey Lynn Fayman, an author and SDWEG member whose book I purchased as a result of seeing it on a Bargain Booksy offering, had this to say about the platform.
I was actually smart enough to track my promotions this year. Bargain Booksy was one of the better ones. As near as I could tell, I got 70-100 sales from it, which just about made my money back, which I count as a victory.
The price for listing a title on Bargain Booksy depends on the genre, with popular subgenres costing more than less popular ones.
BookBub was my introduction to getting low-cost deals for ebooks.
BookBub states its purpose is to help millions of readers discover books they’ll love while providing publishers and authors with a way to drive sales and find new fans.
When I first received BookBub’s emails, I stocked up my Kindle with free books. Very soon, however, I became more selective as I realized I didn’t have time to read them all. If I paid for one, even if the amount was small, I was more likely to include that ebook in my real to-read pile. I started keeping track of those I purchased by putting them on my Goodreads shelf labeled purchased.
Early Bird Books is my favorite because it offers the largest number of books in each message, often classics and best sellers from past decades. Recently works by F. Scott Fitzgerald, Studs Terkel, Eudora Welty, Graham Greene, Michael Crichton, Paul Theroux, Ngaio Marsh, Nathanial Hawthorne, and Mark Twain all appeared in an offering on the same day.
After doing research into how to get a book included in one of Early Bird Books email lists, I understood why it includes so many books, especially the classics: It is primarily a source of titles from publishers that include ads for Early Bird Books within the books. It’s possible to submit a book to be included, but the cost is steeper than for others. I’ll be looking for books by authors I know there to see if I can get feedback on the value.
The format for messages from this platform includes the book cover images at the top center for each entry. This makes judging the books by the cover easy, though I like to think of myself as being more discerning and attracted as much to the descriptions as to the covers.
Free Booksy is connected to Bargain Booksy. The difference is in the name. A book must be free to be listed on Free Booksy. But while the book is free to the reader, the cost for using Free Booksy is higher than for Bargain Booksy because the number of potential readers on their lists is greater.
This platform appeals more to those who feel lucky enough to win a weekly windfall of lots of books. And they are hardcover or paperback, not ebooks. It’s also great for checking out book cover designs that appeal to you and that fit a specific genre. If I ever win one of their weekly contests, I’ll stock up my Little Free Library (after reading those that touch my reader’s heart).
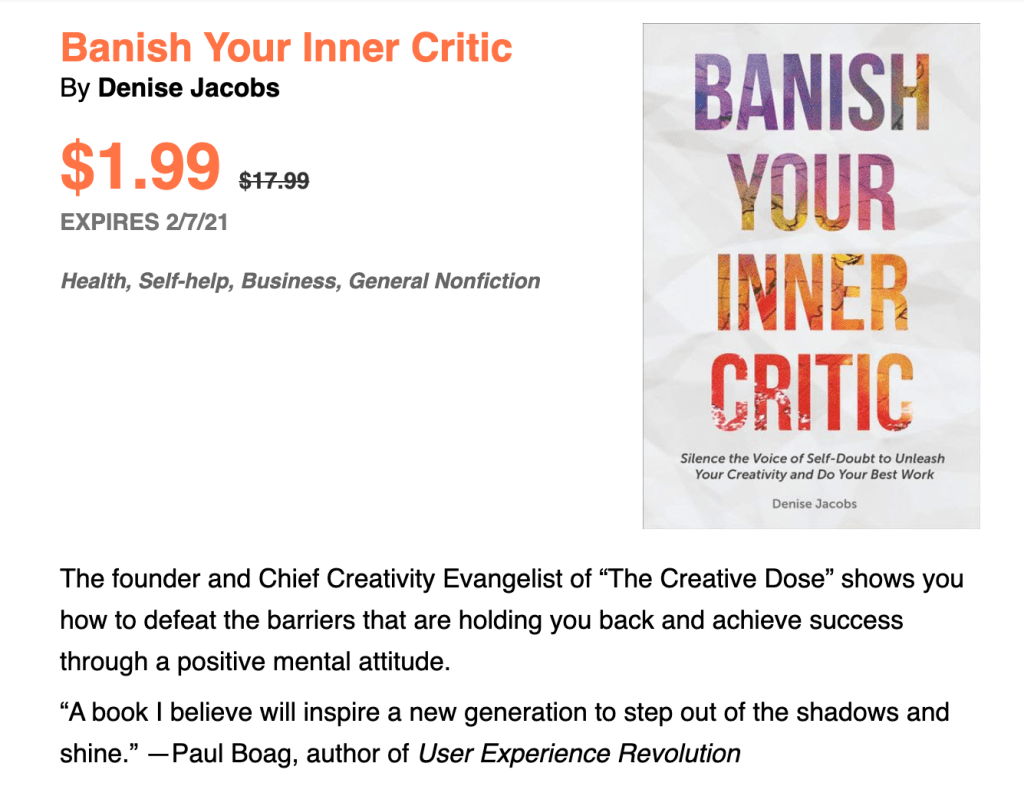
Of those listed, this platform offers the fewest number of books in each message. The image of the cover to the left often is too small to see details, though more information about featured books is included to the right than on other platforms. I’m rarely interested in knowing the number of pages the book is, and if I decide to look further, I’ll see whether it is still on sale and whether an audiobook version is available. For me, the information in the right column is wasted space.
Listing a book with The Fussy Librarian appears to be less expensive than other platforms. However, since they include fewer books in each promotion, it may be difficult to pick the date you want.
When I asked another SDWEG member, Cary Lowe, about his decision to take part in one of its campaigns, he told me the following:
I wasn’t aware my book was offered on there. Must be something my publisher did. In any case, based on sales figures, the listing didn’t appear to generate significant interest. Nonetheless, I would continue using promotions like this, as they offer access to new audiences and generally do not displace regular sales.
My observations
Since one of my reasons for checking out these platforms is to determine whether I might use them when I complete my work-in-progress, my observations about the platforms are framed to address that.
If I had to choose just one of these platforms, I lean at this point toward Early Bird Books because it provides the widest range of options to readers. But since the cost of listing with them is higher than the others, I’ll have to consider the potential for return on my investment.
If I had a book series to offer, I would not use The Fussy Librarian since the image to the left of each entry is too small to read. The impact of the book covers is lost in this format.
Have you used any of these platforms?
If so, please leave a comment if you’re willing to share it with others, or send me a message if you prefer to keep your thoughts private.